
Introduction
How does one teach density?
Density is a fundamental concept in science that extends far beyond the classroom. Many don’t realize how much it affects our everyday lives.
Teaching density involves more than definitions and problems. Why? Density is not an easy concept for developing adolescents to grasp.
Why does oil float on water? Why do icebergs remain partially submerged in the ocean? How can one object feel heavier than another despite being the same size?
These phenomena all boil down to differences in density. This property determines why ships made of steel can float, how weather patterns form, and even why we use specific materials for building or insulating.
By mastering the concept of density, students can unlock the ability to predict and explain these everyday occurrences. They lay a foundation for more advanced scientific explanations. This knowledge helps them connect abstract scientific principles with the world around them, and that is what makes science both meaningful and exciting.
In this post, I will explain how I tackled this difficult concept and help you teach density more effectively. I’ll cover the methods and techniques I used to grow middle school science students’ understanding of density.
Teach Density with the Basics
I have always said, “Science is a foreign language.” I meant that you must understand the terminology (definitions) to understand the concepts. So, giving a student the definition of density right off is comparable to asking a first grader to solve an algebraic equation.
Sure, you could start with the definition of density. I don’t think that is a wise choice. So, I wouldn’t.
A better approach is to start with prior knowledge. Say, “Which floats in water, a cork or a rock?” After a series of easy questions like this, they are sufficiently prepped for deeper diving.
(When I teach density, I have an animated slide presentation that covers all aspects of the topic. From questions designed to engage prior knowledge to definitions to sample density problems and outlines for a density lab. It’s all in the slide presentation. So, as you read through this post, imagine you are viewing a slide presentation. )
Or, you can start with phenomena-based examples like icebergs, steel ships, submarines, hot air balloons, and the like. For a quick hands-on phenomenon, ice in a beaker of water will do the trick. Or, use a wave bottle (linked below).
Going back to the idea of science as a foreign language, we can then provide and dissect the definition of density. In particular, the words mass and volume. Without a grasp of what those words mean, they still won’t get the idea.
It’s best to teach density by accessing prior knowledge over and over. For mass and volume, ask them a series of questions to get them comfortable with the idea of mass and volume.
Starting with mass, you can say “Which has more mass, you or a lineman on a professional football team?” Moving on to volume you can do the same thing. “Which has more volume a golf ball or a soccer ball?”
They will quickly feel confident about their understanding of these terms. Then you can go over the definitions. Mass is the amount of matter in an object (how many molecules are packed into something) while volume is the amount of space something takes up.
Mass
With that foundation, you can revisit or introduce the density definition.
In my classes, by the time we reach the topic of density, students have already practiced and know how to use a balance (3-beam & electronic), metric ruler, and graduated cylinder. (It’s our beginning of the year equipment checkup.) So, using the lab equipment for density becomes more of a rehearsal and practical application than an introduction.
If you haven’t covered how to use a balance, this is the perfect time to do so. The 3-beam balance is the more involved of the two. However, the idea behind the 3-beam balance isn’t difficult to grasp. Electronic balances are simple. The only caveat for electronic balances is explaining how to use the tare feature. Overloading an electronic balance is an issue too.
Naturally, you will want to follow up your demos and explanations with a little practice. Use objects around the room (not the ones you will use for your density lab) and give them some time to practice. All of this foundational work will improve your ability to teach density and engage students.
Volume
Volume is the only tricky part of density because there are two methods. Before a student measures volume, they need to understand not only what the two methods are, but how to perform the measurements and when to use them.
When measuring volume, the classification of objects falls into either regular-shaped or irregular-shaped objects.
Regular Shaped
Regular-shaped objects are blocky objects. That is to say, anything that has 90-degree corners… rectangular solids if you will.
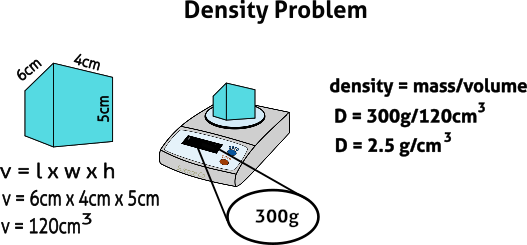
Undoubtedly, students have come across the equation for measuring the volume of three-dimensional objects in math.
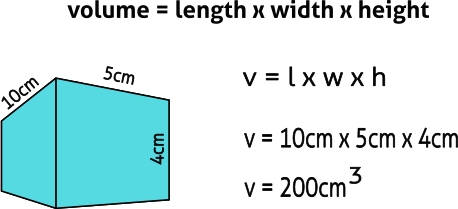
Using this formula, students can determine the volume of any regular-shaped object.
At this stage, if they haven’t practiced using a metric ruler, it’s time to start. Have them practice calculating the volume of “blocky” objects on paper before working on the real thing.
Irregular Shaped
If regular-shaped objects have 90-degree edges, irregular-shaped objects are anything else. Rocks, toys, people, pencils, etc all fall into this category. For the sake of time and to make the math simple, we lump cylindrical and spherical objects into this group.
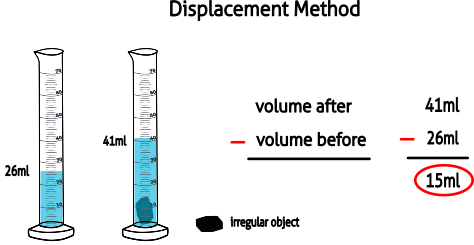
The key to determining the volume of this class of objects is displacement. At this point in my slide presentation, I introduce and explain the concept. If students don’t have experience using graduated cylinders, now is the time.
Next, students are shown how to use a graduated cylinder to determine the volumes of these irregular items.
(Students tend to like this method the best and will attempt to use it for all objects. This is why, when lab practice comes, the regular-shaped items are too big to fit into a graduated cylinder. There is always someone who will ask how to get its volume since it won’t fit into the cylinder. Really?!🤨 “Go talk to your lab partner.” Yes, they get that fixated on displacement.😮💨)
Connecting the Dots: Calculating Density on Paper
All of the above instruction paves the way for putting all the pieces together as you teach density at a deeper level.
This is the point in the slide presentation where I work through several problems with my slide presentation and the whiteboard. This gives them a feel for how the calculations are done.
Then it’s their turn. They are given practice problems via the slide presentation and asked to determine the density of both regular and irregularly shaped objects.
Once they, and I, feel comfortable with the process, we set the next day as a density lab day.
Density Lab Day – Practical Application
This day is set aside for students to calculate the density of a variety of objects (regular and irregular). If you teach density without using lab time/hands-on experience you severely hinder your students understanding.
Labs are the best all-around approach for teaching density. This is the step where all they have learned comes together. And, they develop a much deeper understanding of density.
After a quick reminder of the entire process, students are divided into groups and asked to complete the density lab. Caution: You will have to remind students that any object that is regularly shaped needs to have its volume calculated with a ruler. The volume of anything else can be done via displacement. As a precaution, directions with the reminder are printed on their lab sheet.
Note: I use this lab experience as an opportunity to merge the writing of a proper scientific paper with the development of their density calculating skills.
In some, lab day is the culmination of all the work thus far. It puts all the pieces together in one fell swoop.
Real-Life Application
Either before or after the lab, you must prove to students that this isn’t just another scientific concept or fact with no real-world application.
So, talk about how density is important in their everyday lives…and to science. Weather, tectonic activity, and currents (atmospheric & oceanic) all work via density. Those are large-scale applications. On a smaller scale, you can use the example of salad dressing. Most students have seen the oil and vinegar separation in salad dressings.
For a good visual, use a wave bottle. If you haven’t already used one yet as a demo or phenomena attraction, a wave bottle is a great way to see density in action. Here’s a link on how to make one. It’s super simple.
Follow-up
You’ve reached the end of the lesson. But, it’s not time for an assessment yet. Before your final assessment, you’ll need a good thorough review activity or two. Doing this the day before and the day of the assessment will ensure students are well-prepared to test their understanding.
In the past, I used worksheets. Today, online game reviews are an engaging and useful method for reviewing density concepts before the final assessment. Strategically placing checkup quizzes, bell ringers, or exit passes along their journey is important too.
Conclusion
To develop understanding and teach density goes beyond just memorizing a definition—it’s about making connections between scientific concepts and the real world. By building on students’ prior knowledge, breaking down complex terms, and providing hands-on experiences, you can help them truly grasp how density influences everything from weather patterns to everyday objects.
This step-by-step approach not only strengthens their scientific understanding but ignites their curiosity, making science a subject that clicks with their lives. Through approaches like building on prior knowledge, practice problems, the density lab, and providing real-life applications, you empower students to see the importance of science in their world, making learning both meaningful and exciting.
These resources are designed to help you teach density.

This product is the perfect toolkit for teaching density, with six expertly crafted components to ensure your students grasp this critical concept.
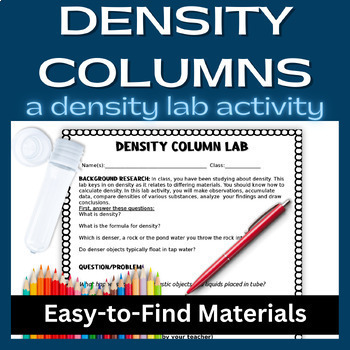
This lab is ideally suited for class use! Using readily available or inexpensive materials, the density column lab activity is the perfect accompaniment to a unit on Matter and/or Density.
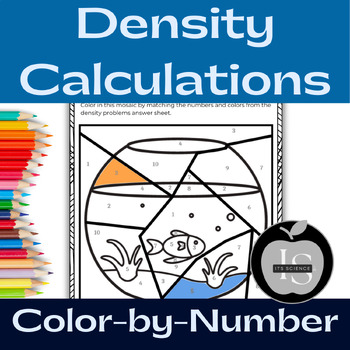
This innovative product blends the principles of density calculation with the joy of artistic expression. All while enhancing your student’s fundamental skills of calculating density and unraveling its mysteries.
Here’s a way for students to practice solving density problems by performing calculations.
The 26-slide Boom Cards product is a thorough review of the mathematical calculations for density.