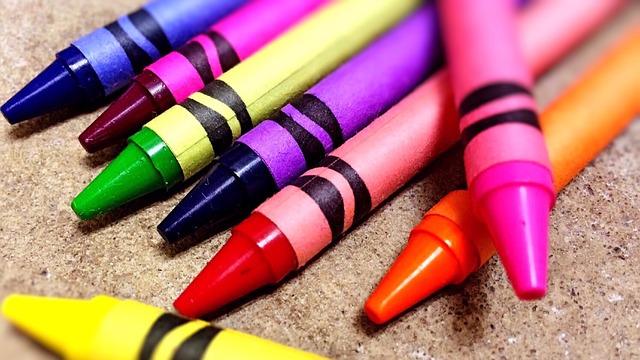
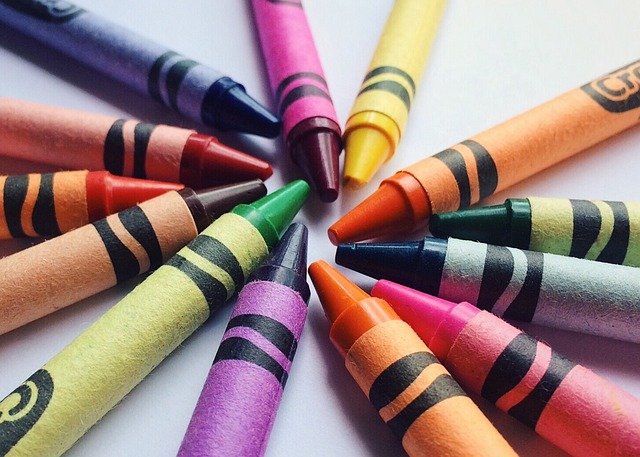
Unleash your students’ inner scientists and prepare them to embark on a colorful science journey with these three easy science experiments utilizing crayons! Science experiments don’t have to be complex. Sometimes the simpler and easier they are, the better.
If you think crayons are just for coloring, think again. In this article, we’ll unlock the world of science and discover three captivating connections with these humble drawing tools. Just for drawing?… I don’t think so.
With a little heat and a few simple tools, you’ll excite your students as they dive into the science of color, thermal energy, and art. It’s time for an engaging and easy series of science experiments to refocus and thrill students in these last days of the school year. Plus, it is a grand review of and connection to key concepts you have already taught.
From the magic of crayon interactions to the captivating effects of melted crayon art, these experiments offer a unique way to engage your pupil’s creativity while learning about or reviewing scientific principles. Whether you teach elementary or middle school, these experiments are perfect for learners eager to explore the wonders of science through a colorful lens.
So grab that crayon box, or those nubs you have lying around, and prepare to unleash your student’s creativity as we dive into the vibrant world of crayon science. Get ready for an experience that will engage their minds, ignite that curiosity, and bring out their inner scientist.
Let the colorful adventures begin!
Experiment 1: Color Mixing
Have you ever wondered how colors mix to create new shades? Number one of the easy science experiments will reveal the secret behind color mixing using crayons. You’ll need a white sheet of paper, three primary colors of crayons (red, blue, and yellow), and a little curiosity.
Materials needed:
- red, blue, and yellow colored crayons
- aluminum foil
- hair dryer, heat gun, or hot plate (set temperature low)
- Oven mitts or heat-resistant gloves
- stirring rod (long match stick, bamboo skewer, craft sticks…)
- tongs
Step by Step Instructions
- Lay down aluminum foil or newspaper to protect the work surface from melted wax. Ensure proper ventilation in the room!
- Create 3 or more “boats” from the aluminum foil. These will hold the crayon pieces and serve as a mixing dish.
- Start by selecting each of the primary colors, cut off several pieces of each color (about 2 cm long should do), remove all paper wrappings, and add one piece to each of the aluminum boats/cups.
- Have students write a hypothesis for each test they wish to perform.
- Using the hair dryer, heat the colors of crayon for each hypothesis (use the stick or tongs to hold the boats in place when heating). Add and mix the contents of one boat to another using a match stick or other disposable mixing stick.
- Record all observations and results being sure they confirm or reject their hypothesis.
- Repeat the above steps with different combinations of crayons, noting the colors created.
- Have them experiment with different quantities of the colors.
- Allow the crayon “coins” to cool before testing their colors on paper.
Scientific Explanation
The colors we see are a result of light reflecting off objects. When we mix crayons of different colors, we are essentially combining pigments that absorb and reflect different wavelengths of light. By blending the primary colors, we can create secondary colors like orange (red+yellow), green (blue+yellow), and purple (red+blue). This experiment allows students to witness firsthand how primary colors combine to form new colors.
Safety Precautions
Crayons are generally safe to use, but the heating process will create fumes. With that in mind, make sure that students apply just enough heat for the melting process. No more, no less.
Fun Variation
Instead of using primary colors, have students experiment with different shades of the same color. For example, try blending light blue and dark blue crayons to observe how variations in shade affect the resulting color.
Extensions
A variation of the same theme (in reverse) is the color-changing milk experiment. Here is a link.
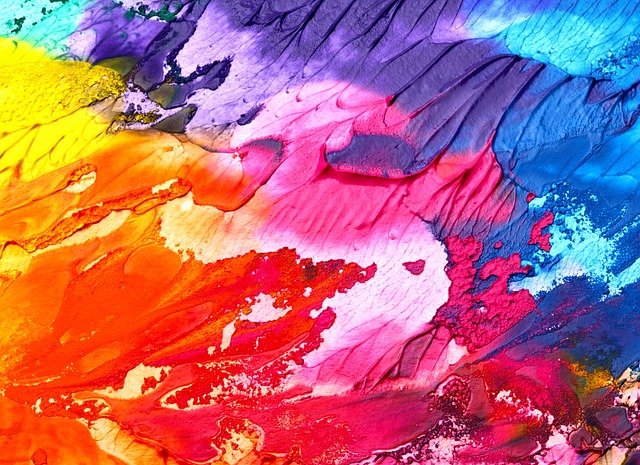
Experiment 2: Crayon Art
Who said crayons were limited to elementary-age art projects? In this second of the easy science experiments, students use heat to create crayon art of a different nature.
Materials Needed:
- Crayon pieces (assorted colors)
- Hair dryer, hot plate, or heat gun
- Thick paper
- Aluminum foil or newspaper (to protect work surface)
- Oven mitts or heat-resistant gloves or tongs
- Optional: Masking tape or stencils for creating designs
Step-by-Step Instructions
- Lay down aluminum foil or newspaper to protect your work surface from melted wax. Ensure proper ventilation in the room.
- Place your canvas or thick paper on the protected work surface. If desired, use masking tape or stencils to create outlines or designs on the canvas.
- Peel the paper wrappers off the crayon pieces and break them into smaller chunks. Organize the crayon pieces according to the colors you want to use.
- Turn on your hair dryer or heat gun to a low or medium-heat setting. Hold it about 6-8 inches away from the crayon pieces to avoid overheating. Begin melting the crayons by directing the heat towards them.
- Explore different techniques to melt the crayons onto the canvas. You can hold the hair dryer directly over the crayon pieces to create drips and splatters, or you can angle it to blow the melted wax in specific directions. Get creative and try out various patterns and designs.
- Once you’re satisfied with your artwork, turn off the hair dryer or heat gun and allow the melted wax to cool and solidify on the canvas. This may take a few minutes.
- Masking Tape or Stencils (if used): Carefully peel away any masking tape or stencils to reveal your final design. Be gentle to avoid damaging the artwork.
- Once the wax has completely cooled and hardened, your crayon art is ready to be displayed! Hang it up on a wall or place it on a display stand to showcase your creativity.
Scientific Explanations:
When crayons are heated, the wax component begins to melt due to the heat energy being transferred to the crayon from the hair dryer or heat gun.
As the wax melts, it liquifies and can be manipulated to create various patterns and designs on the canvas.
When the melted wax comes into contact with the canvas or paper, it solidifies as it cools, resulting in a permanent artwork.
Safety Precautions
- Always use caution when handling hot hair dryers or heat guns. Wear oven mitts or heat-resistant gloves to protect your hands from burns.
- Ensure proper ventilation in the room to prevent inhalation of fumes from melted wax.
- Supervise children closely during this experiment to prevent accidents.
Fun Variations and Extensions
- Experiment with different heat settings on the hair dryer or heat gun to see how they affect the melting process.
- Try using different surfaces for your artwork, such as wood, fabric, or even recycled materials like cardboard or aluminum foil.
- Mix crayon shavings or glitter into the melted wax for added texture and visual interest.
- Collaborate with friends or classmates to create a collaborative crayon art mural.
- Explore the use of stencils or masking tape to create negative space designs within your artwork.
Experiment 3: DIY Lava Lamp
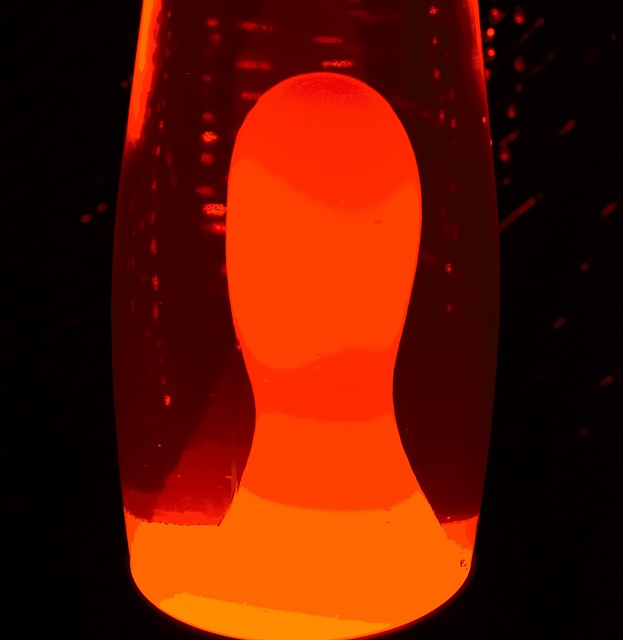
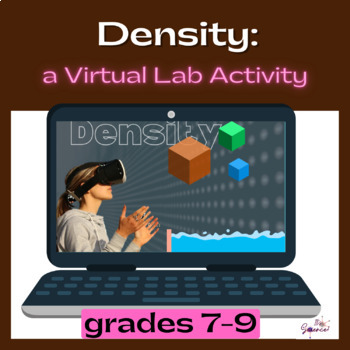
Huh? A crayon lava lamp? Get ready to create a mesmerizing homemade lava lamp using the power of crayons and simple household materials. This last of the easy science experiments will captivate your students with its colorful display and provide an opportunity to explore the principles of density(link) and buoyancy.
Materials needed:
- Clear plastic bottle or glass jar
- Water
- Vegetable oil
- Food coloring
- Alka-Seltzer tablet
- Crayons in various colors
Step-by-step instructions:
- Fill the plastic bottle or glass jar about three-quarters full with water.
- Add a few drops of food coloring to the water and stir or shake to mix the color evenly.
- Using a knife or scissors, shave small pieces of crayons into the bottle or jar. Choose colors that contrast with the food coloring for a more vibrant effect.
- Fill the remaining space in the bottle or jar with vegetable oil, leaving a small gap at the top.
- Break an Alka-Seltzer tablet into small pieces and drop them into the mixture.
- Observe as the tablet reacts with the water, creating gas bubbles that rise through the oil and crayon mixture, resembling a lava lamp.
- The colored crayon pieces will rise and fall with the gas bubbles, creating a captivating display of color and movement.
Scientific explanations:
The principle behind the homemade lava lamp experiment lies in the differences in density between the water, oil, and crayon shavings. Water is denser than oil, which causes it to sink to the bottom of the bottle or jar. The crayon shavings, being denser than both water and oil, initially sink to the bottom as well.
When the Alka-Seltzer tablet reacts with the water, it produces carbon dioxide gas bubbles. These gas bubbles attach themselves to the water molecules, causing them to become less dense than the surrounding oil. As a result, the gas bubbles and the water rise through the oil, carrying the colored crayon shavings along with them.
Once the gas bubbles reach the top, they pop, and the water and crayon shavings sink back down to the bottom, ready for another cycle. This continuous rising and sinking motion creates a mesmerizing effect reminiscent of a lava lamp.
Safety precautions:
- Adult supervision is recommended, especially when using sharp objects.
- Avoid ingestion of any materials used in the experiment, including the Alka-Seltzer tablet.
Fun variations and extensions:
- Experiment with different ratios of water to oil to observe how it affects the motion and color display.
- Try using different colors of food coloring and crayons to create unique combinations and patterns.
- Explore the effects of temperature on the lava lamp’s motion by placing it in warm or cold environments.
- Encourage students to research the science behind commercial lava lamps and compare their homemade version to understand the underlying principles.
Conclusion
There you have it. Three easy science experiments using something you already have in the classroom! You’ve unlocked the world of colorful science and discovered the hidden wonders of crayons beyond their artistic uses. From the captivating color mixing to the intriguing effects of melted crayon art and homemade lava lamps, each experiment offers a unique opportunity to engage with scientific principles creatively and playfully.
Remember, science is all around you, waiting to be explored and understood. So keep nurturing your student’s curiosity, unleashing their creative potential, and helping them embrace the scientist within them. The world of colorful science is vast and full of possibilities. Who knows what other amazing discoveries you might come up with, with a simple crayon in hand?
So, go ahead, gather your students, and embark on this colorful adventure together. Let the rich world of crayon science inspire and ignite their ( and your) passion for learning and exploration. Happy experimenting!
Safety Precautions for Conducting These Easy Science Experiments
When conducting any science experiment, it is essential to prioritize safety. While these crayon experiments are generally safe, it’s important to take a few precautions to ensure the well-being of your students. Here are some safety guidelines to follow:
- Adult supervision: Make sure there is always a responsible adult present during the experiments to oversee and guide the students.
- Proper ventilation: Conduct the experiments in a well-ventilated area to prevent the buildup of any potentially harmful fumes or gases.
- Use appropriate heat sources: If heat is required for any of the experiments, use safe heat sources such as hot plates, hair dryers, or heat guns. Avoid open flames or high-temperature heat sources to prevent accidents.
- Protective equipment: Depending on the experiment, it may be necessary to provide students with safety goggles or gloves to protect their eyes and hands from any potential hazards.
- Clean workspace: Ensure that the workspace is clean and free from any clutter or obstacles that may cause accidents or hinder the student’s ability to conduct the experiments safely.
By following these safety precautions, you can create a secure and controlled environment for your students to explore the colorful world of crayon science.
Related Resources