
Making your own great science experiments
In this post, we will work through an example of how to create great science experiments and lab activities. By following these 5 steps, you can take any idea and turn it into a custom lab activity and experiment.
In a previous post, Creating Labs from Scratch, we covered:
- Why labs are important
- Why you should create your own labs
- What you need to get started
- How to make them unique for your students
- the basic building process
This follow-up post continues as we work through an example. As with teaching, students learn best with examples (relatable samples). So too, the following process will give you a feel for the process.
Looking for “perfect” (great) science experiments
As you teach, there will be times when a lab activity is required because of your state’s requirements. Or you have determined the need for one.
Creating your own labs from scratch can evolve for many reasons.
- There may not be a lab suitable for what you want. You can’t find one anywhere. So, you have to create the whole thing.
- You may find a lab that looks good. However, you see that the objective requirements are off, the equipment list is too expensive, and/or other factors don’t do what you need them to do. This lab needs a few major modifications.
- You find a lab you like that only needs a few modifications. So, a few tweaks are all that you need to make it right for your students.
In any case, you can use any or all of the following steps to ensure your lab activity is suitable for your students.
These steps are set up to address the first reason listed above.
Step 1- What is the objective?
To go from ideas to great science experiments, you have to decide on your goal.
What do you want to get across?
How will a lab on X get across what you (or your school system) require?
Step one is to define your objective, which defines the related investigation problem.
Let’s say you are or will be studying motion. In particular, the topic is Newton’s laws of motion.
You have to know the laws. Duh! Because, without really understanding them, you can’t create a good tailored lab.
For this example, let’s narrow the topic down to Newton’s 2nd law of motion. (Normally, I would incorporate all 3 laws into one lab…as they fit well into any example. But for the sake of this sample, let’s stick with the 2nd law.)
You know that the second law is summed up in the equation
force = mass x acceleration
The law reads, “The amount of force generated by an object or on another object depends on an object’s mass and acceleration.”
In physics class, it reads more like this: “the amount of acceleration of an object is directly proportional to the force acting on the object and is indirectly proportional to the mass of the object.”
For middle schoolers, that goes over about as well as trying to get them to understand quantum mechanics. Thankfully, you have already covered the second law with plenty of examples, videos, and/or demos.
Step 2- Figuring out the materials
With the objective in mind, you proceed with the creative process. How can I create a lab that relates to Newton’s 2nd law? And, just as important, what materials do I have on hand or can borrow or buy that will help me accomplish this?
So, you do a little research. And you find that physics classes use impact cars (or something like that). But you don’t have or cannot get your hands on that equipment. And, you sure can’t afford it.
What can I use that will work (and is cheap)? So, you think…and think…and think.
“AHA,” you cry. “I’ve got it!”
That foam insulation piping we used to make rollercoasters would make a great ramp. And, marbles used as cars make the perfect mass to accelerate.
Now you have the mass and acceleration portions down. “The force,” you say to yourself, “will be the force of the marble impacting something. Hmm. What can the marble impact?”
“How about a cup? A paper cup. If cut in half length-wise, it acts as an impact surface for the marble!” This is so brilliant.
In your mind, you “see” the setup looking something like this…

Step 3- Identifying the Variables
I use a template for most of the labs I create. You can pick one up here.
Using the objective, you need to define the variables.
The independent variable is the one that you change. I like to tell the students, “It’s the one you mess with and change”.
Thinking about the materials you have, you see that you can change several things:
- height of the ramp (which will affect the acceleration)
- mass of the marble (which will affect the force)
- length of piping
- etc
For this example, let’s stick with “height of ramp”. That keeps you from finding different-sized marbles or cutting your piping (which would make it less suitable for the next time you conduct the roller coaster lab).
Books are easy to come by. If not, you can have students tape the ramp end to a wall at different heights. (Masking tape is cheap.)
The dependent variable responds to changes made in the independent variable. Or, as I say, “It is the variable you measure and record in a data table”.
In this case, that would be how far the paper cup travels from the end of the piping. By the way, I have found that adding a small weight to the middle of the cup half helps a lot.
The cup’s movement, and how far it travels, will be a measure of the force applied. (farther = more force & vice versa)
Last are the constants or control variables. These are the ones (there is ALWAYS more than one) that have to stay the same throughout the testing.
They would be things like:
- size of marble
- length of ramp
- position of cup
- size of cup
- etc, etc
Step 4 – Carving it to suit your students
Now it’s time to flesh out your problem and materials… on the template. This helps you “visualize” it.
Next, it’s time to decide what your students can handle. Will a more open-ended lab approach work for them? Or, do they need a bit of leading and guiding?
You know your students and what they can and can’t handle!
If you have a class that can handle the open-ended version, there are a few routes to take:
- You could explain the general idea of the lab activity and then let them “have at it”. This means they may come up with the problem on their own (in which case you will need different size marbles…), identify variables, write the hypothesis…
- You could give them the problem “How will the height of a ramp affect the amount of force a rolling marble creates?” If you have spent time molding a lab for your students, it’s essential that the ending drives home the intended purpose. (which will limit them to one independent variable). Then they have to identify the variables, write a hypothesis…
For more structure, you can provide the problem and then lead the class through identifying the variables, writing a proper hypothesis, and setting up a data table.
From there, you can form the groups, give them the supplies…and away they go.
Step 5 – Wrapping it up
The last step is developing the concluding question or questions.
If you have spent all of this time creating great science experiments for your students, the end must drive home the intended purpose.
Will you:
- Provide a series of questions that direct their thinking toward the desired aim
- Ask them to analyze their results in a few paragraphs and relate them to the topic
- Use a combination of the two
- do something different (have a class discussion, compare groups’ results, and have them graph their results versus the classes…)
Here is a visual/video of the above process.
Wrapping it up
In conclusion, crafting your great science experiments is a rewarding journey that empowers you to tailor your teaching to the unique needs and interests of your students. By following the outlined steps, from defining objectives to identifying variables, you can create engaging and effective lab activities. If you’re looking for additional science labs, activities, and classroom materials to complement your own creations, explore these digital science resources for upper-elementary and middle-school teachers. The example of designing a lab on Newton’s 2nd law of motion demonstrates the flexibility and creativity involved in this process.
Whether faced with curriculum requirements, the need for modifications, or a desire for a more tailored approach, the ability to generate great custom science experiments is a valuable skill. This approach ensures that the experiment aligns with educational goals and encourages student participation and comprehension. Ultimately, the process of making your own great science experiments fosters a dynamic and interactive learning environment, enhancing both teacher and student experiences in the realm of scientific exploration.
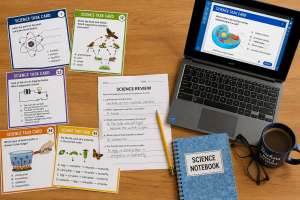
Helpful Resource
Once you have created that wonderful lab experience, you can make sure that lab day is an absolute success by following the 4 principles outlined in this free guide for Creating an Outstanding Lab Experience.
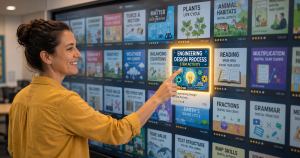
Lack the time to come up with that lab? We’ve got you covered. Come on over and check out our store.